SUBHEAD: Harvesting and growing cassava trees to make baked chips for your own dips.
By Juan Wilson 4 September 2012 for Island Breath -
(http://islandbreath.blogspot.com/2012/09/cassava-chips-life-cycle.html)
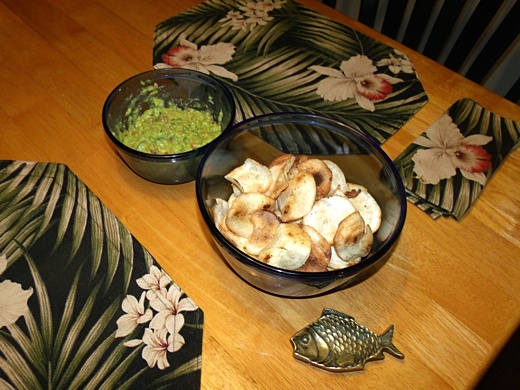 Image above: The goal - a fresh guacamole ready to be devoured with hot crisp cassava chips. Photos by Juan Wilson unless noted.
[Author's note: Cassava contains cyanide. The amount varies widely and should be considered when using cassava in your diet. With the right variety and use there is little risk. With even the more dangerous varieties, simply soaking, cooking or fermenting the peeled root is all that is usually needed to make them safe. "Societies that traditionally eat cassava generally understand some processing (soaking, cooking, fermentation, etc.) is necessary to avoid getting sick.[36]" See (http://en.m.wikipedia.org/wiki/Cassava).]
We love eating dips and chips. For years we've been making baba ghanoush with our own eggplant and guacamole with or own avocados. Until recently we've scooped up these delicious dips from commercially packaged chips made of corn, rice and taro.
Now we are experimenting with making our own chips with cassava. The results have been successful enough to now share. This article will also include our experience with the whole life cycle needed to reproduce the cassava.
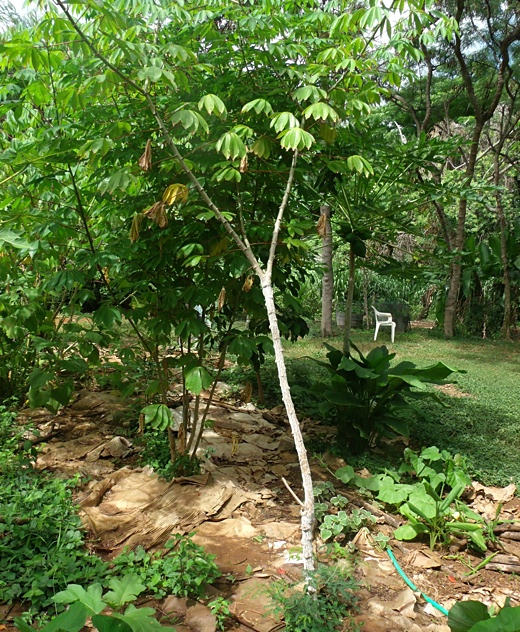
Image 1 above: A cassava tree with a 2" trunk ready for harvesting. Photos by Juan Wilson unless noted.
To make chips you first select the tree you will use. Cut it down and be careful not to destroy the smaller branches (1/2" in diameter). Use a mattock to clear the ground around the tree until you detect reaching the tops of the laterally arrayed root lobes. They should be about as big around as a good sized potato chip.
I usually then flood the hole around the stump to soften the earth. Then using a hoe and pick carefully clear around the roots as required to free them without breaking them into little pieces.

Image 3 above: An example of a full harvest of cassava root structure from a single tree. From (http://fruits-veges.blogspot.com/2010/08/root-cassava-is-yummy.html).
A perfectly cleared root structure looks something like this image above and can have almost a dozen good sized lobes.
 Image 4 above: Some of the root lobes unearthed from hole. Photos by Juan Wilson unless noted.
Once you have the lobes out of the ground wash them of all dirt. One good sized lobes can make a serving for two. Use a scrubby as needed.
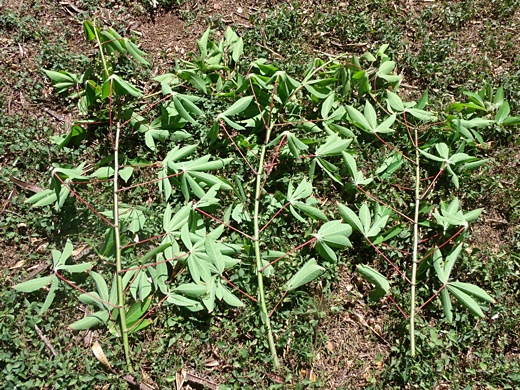
Image 5 above: Cassava branches ready for replanting. Photos by Juan Wilson unless noted.
You will use the downed cassava tree for reproduction. Cassava can be reproduced by merely sticking a green branch from the downed cassava tree into the ground. Lop off as many of the the smaller branches as you want to grow more trees. One tree can easily start another dozen.

Image 6 above: A cassava sapling planted from a branch at six months old. Photos by Juan Wilson unless noted.
To start them mere dig or puncture a small hole in good soil and push the branch into it. The leaves will fall from the branch. Keep the area around the branch from drying out for any long period, but otherwise little or no maintenance is required. Once new leaves start the plant can be left alone. If the new leaves droop water the sapling. You'll get a better harvest if the soil is somewhat loose and free of rocks. Soil amendments like chicken droppings and compost can help, but you should find cassava an eager grower.
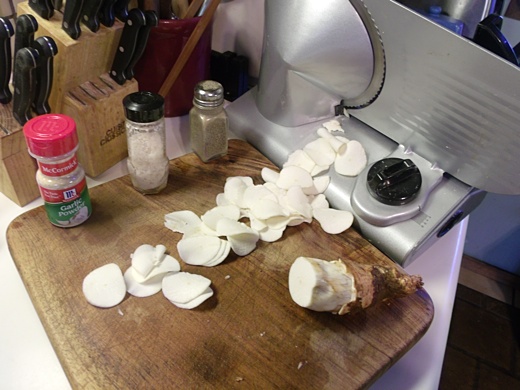
Image 7 above: A peeled cassava root partially sliced for chips. Photos by Juan Wilson unless noted.
After the lobes are thoroughly washed cut the tips off. There will likely be some brown outer skin over some partially exposed white under skin. Use a knife tip the break away the outer white skin. It should peal away evenly and without great effort. It's the inner white core we will use for the chips. We bought a small electric meat slicer for about $30 from Walmart for slicing chips.
Slicing chips thinly and evenly is very important. Too thick and they won't be like chips after they are cooked. If they are uneven and some will be burned and some damp out of the oven. Try slicing the chips as thin as you can and maintain a full uniform cut across the cassava root. If you have several root lobes I suggest you slice them all and freeze the results in one quart plastic bags to serve two. Several bags should result from one harvest.
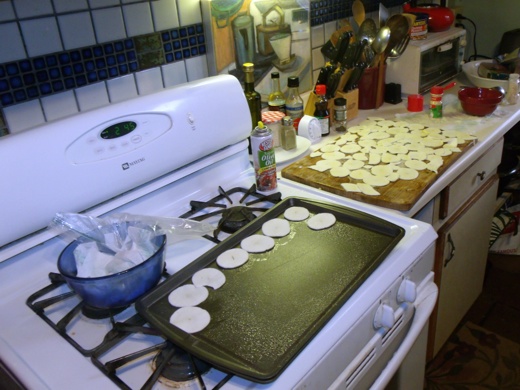
Image 8 above: Baking tray being loaded with seasoned root slices. Photos by Juan Wilson unless noted.
When we are about to bake chips we oil them. I've tried two methods that work. One way is to dampen two layers of paper towels with extra virgin olive oil. Lay the chips on the oily towel and press down lightly. Then turn the chips over and repeat a light pressing into the towel. Season the exposed oily side of the chips lightly to taste with garlic powder and crushed see salt.
Then two oven cookie sheets with the oily towels and lay out the chips in the pans. The other way is to buy a can of spray-on extra virgin olive oil that is available at Big Save under Pam and Western Family brands. Spray oil lightly on the cookie sheet. Place the cassava slices closely together on the sheet. Lightly spray the slices and season. Turn them over and lightly spray them again. Season to taste.
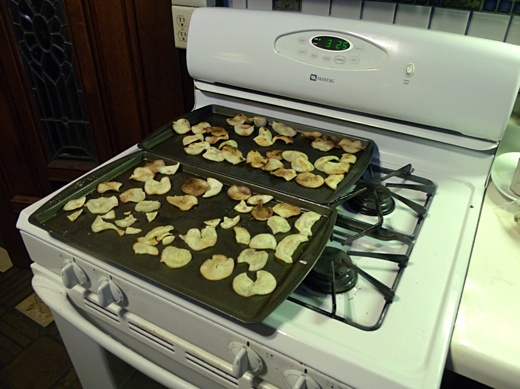
Image 9 above: Two trays of chips cooling before serving. Photos by Juan Wilson unless noted.
Place the two cookie sheets into the oven at 300-325ºF. Toast for 15 minutes. Turn the chips over and Toast for another 15 minutes. This part can be quite tricky. Much is dependent on how thick the chips are. Until you are confident of the results watch the toasting closely. Enjoy!
.
By Juan Wilson 4 September 2012 for Island Breath -
(http://islandbreath.blogspot.com/2012/09/cassava-chips-life-cycle.html)
Image above: The goal - a fresh guacamole ready to be devoured with hot crisp cassava chips. Photos by Juan Wilson unless noted.[Author's note: Cassava contains cyanide. The amount varies widely and should be considered when using cassava in your diet. With the right variety and use there is little risk. With even the more dangerous varieties, simply soaking, cooking or fermenting the peeled root is all that is usually needed to make them safe. "Societies that traditionally eat cassava generally understand some processing (soaking, cooking, fermentation, etc.) is necessary to avoid getting sick.[36]" See (http://en.m.wikipedia.org/wiki/Cassava).]
We love eating dips and chips. For years we've been making baba ghanoush with our own eggplant and guacamole with or own avocados. Until recently we've scooped up these delicious dips from commercially packaged chips made of corn, rice and taro.
Now we are experimenting with making our own chips with cassava. The results have been successful enough to now share. This article will also include our experience with the whole life cycle needed to reproduce the cassava.
Image 1 above: A cassava tree with a 2" trunk ready for harvesting. Photos by Juan Wilson unless noted.
To make chips you first select the tree you will use. Cut it down and be careful not to destroy the smaller branches (1/2" in diameter). Use a mattock to clear the ground around the tree until you detect reaching the tops of the laterally arrayed root lobes. They should be about as big around as a good sized potato chip.
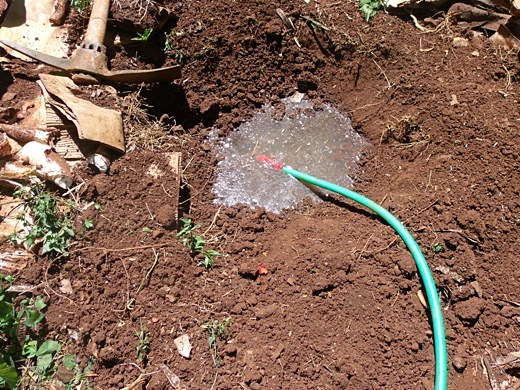 Image 2 above: Flooding hole above cassava root structure. Photos by Juan Wilson unless noted. Image 2 above: Flooding hole above cassava root structure. Photos by Juan Wilson unless noted. |
Image 3 above: An example of a full harvest of cassava root structure from a single tree. From (http://fruits-veges.blogspot.com/2010/08/root-cassava-is-yummy.html).
A perfectly cleared root structure looks something like this image above and can have almost a dozen good sized lobes.
Image 4 above: Some of the root lobes unearthed from hole. Photos by Juan Wilson unless noted.Once you have the lobes out of the ground wash them of all dirt. One good sized lobes can make a serving for two. Use a scrubby as needed.
Image 5 above: Cassava branches ready for replanting. Photos by Juan Wilson unless noted.
You will use the downed cassava tree for reproduction. Cassava can be reproduced by merely sticking a green branch from the downed cassava tree into the ground. Lop off as many of the the smaller branches as you want to grow more trees. One tree can easily start another dozen.
Image 6 above: A cassava sapling planted from a branch at six months old. Photos by Juan Wilson unless noted.
To start them mere dig or puncture a small hole in good soil and push the branch into it. The leaves will fall from the branch. Keep the area around the branch from drying out for any long period, but otherwise little or no maintenance is required. Once new leaves start the plant can be left alone. If the new leaves droop water the sapling. You'll get a better harvest if the soil is somewhat loose and free of rocks. Soil amendments like chicken droppings and compost can help, but you should find cassava an eager grower.
Image 7 above: A peeled cassava root partially sliced for chips. Photos by Juan Wilson unless noted.
After the lobes are thoroughly washed cut the tips off. There will likely be some brown outer skin over some partially exposed white under skin. Use a knife tip the break away the outer white skin. It should peal away evenly and without great effort. It's the inner white core we will use for the chips. We bought a small electric meat slicer for about $30 from Walmart for slicing chips.
Slicing chips thinly and evenly is very important. Too thick and they won't be like chips after they are cooked. If they are uneven and some will be burned and some damp out of the oven. Try slicing the chips as thin as you can and maintain a full uniform cut across the cassava root. If you have several root lobes I suggest you slice them all and freeze the results in one quart plastic bags to serve two. Several bags should result from one harvest.
Image 8 above: Baking tray being loaded with seasoned root slices. Photos by Juan Wilson unless noted.
When we are about to bake chips we oil them. I've tried two methods that work. One way is to dampen two layers of paper towels with extra virgin olive oil. Lay the chips on the oily towel and press down lightly. Then turn the chips over and repeat a light pressing into the towel. Season the exposed oily side of the chips lightly to taste with garlic powder and crushed see salt.
Then two oven cookie sheets with the oily towels and lay out the chips in the pans. The other way is to buy a can of spray-on extra virgin olive oil that is available at Big Save under Pam and Western Family brands. Spray oil lightly on the cookie sheet. Place the cassava slices closely together on the sheet. Lightly spray the slices and season. Turn them over and lightly spray them again. Season to taste.
Image 9 above: Two trays of chips cooling before serving. Photos by Juan Wilson unless noted.
Place the two cookie sheets into the oven at 300-325ºF. Toast for 15 minutes. Turn the chips over and Toast for another 15 minutes. This part can be quite tricky. Much is dependent on how thick the chips are. Until you are confident of the results watch the toasting closely. Enjoy!
.
No comments :
Post a Comment